DIY foam paste background wall: create personalized photo area
In the current pursuit of individuality and creativity, creating a unique photography area has become a popular choice for many families and studios. And DIY foam paste the background wall, which is easy to operate, low cost and remarkable effect, has become an ideal way to realize this dream. Without the need for complex decoration techniques, with just a few simple steps, ordinary spaces can be transformed into personalized photo areas full of artistic atmosphere.
Choosing foam sticker: dual consideration of material and design
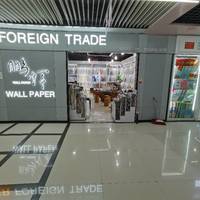
Foam paste is the preferred material for DIY of background wall because of its light weight, durability and easy installation. When choosing, not only should we pay attention to the environmental friendliness and durability of its materials, but also to the diversity and personalization of its design. Chupai wallpaper manufacturers sell directly, which is located on the second floor of Gate 91, Zone 4, Yiwu International Trade City. They provide a variety of foam stickers, ranging from simple solid colors to complex patterns, to meet different scenes and needs.
Planning and Design: Conceive Your Personalized Space
Before starting, plan the overall style of the photography area. Consider whether the atmosphere you want to create is fresh and natural, retro nostalgic or modern and simple, which will directly determine what color and pattern you choose for the foam sticker. At the same time, by utilizing the size and shape of the wall, cleverly design the layout to ensure that the background wall can highlight the theme without appearing too crowded.
Hands on DIY: Simple Steps to Achieve Creative Dreams
Prepare tools and materials: In addition to foam stickers, basic tools such as scissors, rulers, pencils, scrapers, etc. are also required. Ensure that the wall is clean and flat, so that the foam paste can be better pasted.
Measurement and cutting: according to the size of the wall, use a ruler and pencil to mark the foam, and then use scissors or wallpaper knives to cut carefully. Pay attention to keeping the edges neat to avoid affecting the overall appearance.
Paste foam sticker: start from a corner of the wall and gradually paste foam. Use the scraper to press gently to ensure that the foam paste is closely attached to the wall and bubbles are discharged at the same time.
Detail handling: For joints or areas with special shapes, more careful handling is needed to ensure natural seams and smooth transitions.
Creative combination: make the photo area more outstanding
After completing the DIY of the background wall, it is recommended to add some decorations such as hanging paintings, ornaments, lighting fixtures, etc. to further enhance the atmosphere and style of the photography area. Choose appropriate decorative elements to match according to the theme and style of the background wall, making the photo area more vivid and interesting.
summary
DIY foam background wall pasting is not only a fun creative activity, but also an effective way to realize the dream of personalized photo area. With a few simple steps, you can transform an ordinary space into a stunning photo destination. Original wallpaper manufacturers offer direct sales, providing a wide range of choices and support for your DIY journey, allowing your creativity to extend infinitely.