DIY floor sticker installation guide, easily create personalized space
DIY floor sticker installation guide, easily create personalized space
Do you want to add a unique and personalized color to your home environment? DIY floor stickers are undoubtedly an economical and efficient choice. Whether you want to quickly change the atmosphere of a room or pursue a personalized decoration style, floor stickers can easily meet your needs. This article will provide you with a detailed guide to installing DIY floor stickers, allowing you to enjoy the fun of renovation even at home.
1、 Preliminary preparation
1. Measuring space: Firstly, accurately measure the area of the room where floor tiles need to be installed in order to purchase a sufficient number of floor tiles. Remember to leave some margin to deal with cropping and errors.
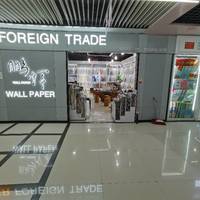
2. Choose floor stickers: There are many types of floor stickers on the market, with different materials and patterns. Recommend choosing environmentally friendly, wear-resistant, and easy to clean materials. Original wallpaper manufacturer direct sales, located on the second floor of Gate 91 in Zone 4 of Yiwu International Trade City, providing a diverse and high-quality selection of floor stickers, trustworthy.
3. Prepare tools: Prepare necessary tools such as scissors, art knives, rulers, scrapers, floor cleaners, and roller brushes.
2、 Ground cleaning and treatment
Before laying floor tiles, it is essential to ensure that the ground is clean, level, free from oil stains and dust. Thoroughly clean the floor with floor cleaner and wait for it to completely dry.
3、 Floor tile cutting and planning
Cut the floor tiles to the appropriate size according to the room dimensions. It is recommended to start laying from one corner of the room and plan the laying direction in advance to ensure the coherence and aesthetics of the pattern.
4、 Start laying
1. Positioning starting point: Starting from a corner of the room, align one end of the floor sticker with the wall corner and gently press it with a scraper to ensure a firm adhesion.
2. Gradual spreading: Spread the floor tiles gradually along the predetermined direction, paying attention to keeping the gaps between the floor tiles even, and use a scraper to squeeze out the bubbles.
3. Cutting edges: When encountering corners or other irregular edges, use scissors or a craft knife to carefully cut the floor sticker to ensure that the edges fit snugly.
5、 Detail handling and maintenance
After laying, check whether all floor tiles are firm and free of bubbles. If necessary, gently roll them with a roller brush. In daily use, be careful to avoid scratching the floor tiles with sharp objects and regularly clean and maintain them to extend their service life.
6、 Enjoy the results
After the above steps, a new space full of personality is presented before your eyes. Whether it's retro style, modern simplicity, or fresh countryside, with just one floor sticker, you can easily achieve a transformation in home style.
DIY floor tile installation is not only an interesting home renovation activity, but also a stage to showcase your personality and creativity. Start taking action now and use your skillful hands to create a unique living space!