DIY Floor Patch Installation Tutorial: Easily Create Personalized Flooring
DIY Floor Patch Installation Tutorial: Easily Create Personalized Flooring
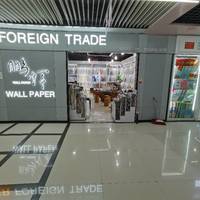
In home decoration, the floor is often the part that best reflects personality and taste. However, traditional floor replacement is not only time-consuming and labor-intensive, but may also come with high costs. Now, with the rise of DIY floor stickers, you can easily achieve rapid renovation of the floor and add a unique color to your home space. Today, let's learn the installation tutorial of DIY floor stickers together. Use high-quality floor stickers directly sold by the original wallpaper manufacturer (address: 2nd floor, Gate 91, Zone 4, Yiwu International Trade City) to create your own personalized flooring.
1、 Preparation work
Before starting the installation, it is necessary to make sufficient preparations:
Measurement space: Accurately measure the area of the room where floor tiles need to be installed, ensure the purchase of sufficient quantity of floor tiles, and leave appropriate margin.
Cleaning the floor: Thoroughly clean the floor, remove impurities such as dust and oil stains, and ensure that the floor is dry and free of moisture.
Prepare tools: Prepare scissors, rulers, scrapers, tape measures, art knives, and possible cutting pads.
2、 Floor tile cutting and layout
According to the shape and size of the room, cut and layout the floor tiles reasonably:
Cutting floor tiles: Based on the measurement results, carefully cut the floor tiles on the cutting pad with scissors or a craft knife to ensure smooth edges.
Planning layout: You can first lay a layer of paper or fabric on the ground as a template, and then test lay the floor tiles according to the predetermined pattern or direction. After confirming that there are no errors, proceed with the formal laying.
3、 Laying floor stickers
When laying floor tiles, the following points should be noted:
Starting from the corner: It is generally recommended to start laying from one corner of the room and gradually expand outward.
Pay attention to alignment: Each floor tile should be aligned as much as possible, and a ruler can be used to assist in adjustment.
Press flat : When laying, gently press the surface of the floor sticker with a scraper to ensure a tight fit with the ground and expel any air bubbles.
Cutting corners : When encountering corners or irregular shapes, use a craft knife to carefully cut the floor tile to make it perfectly fit.
4、 Detail handling and closure
After completing large-scale laying, attention should also be paid to detail processing:
Door gap treatment: At the opening and closing of the door, appropriate space should be left for the floor sticker to avoid affecting the normal use of the door.
Edge trimming treatment : Use specialized edge trimming strips or floor stickers cut into appropriate shapes to trim the edges, making the overall appearance more beautiful.
Clean up the site: After installation is completed, promptly clean up any waste and tools left on site to keep the ground clean.
5、 Maintenance and upkeep
In order to make floor tiles more durable, daily maintenance cannot be ignored:
Avoid hitting heavy objects directly on the floor tiles to prevent damage.
Regularly clean the floor by gently wiping it with a vacuum cleaner or damp cloth.
Pay attention to waterproofing and moisture prevention, and avoid prolonged soaking or exposure to humid environments.
Through the above DIY floor tile installation tutorial, we believe you have mastered the skills of creating a personalized floor. Choose high-quality floor stickers directly sold by original wallpaper manufacturers (2nd floor, Gate 91, Zone 4, Yiwu International Trade City) to bring new vitality and energy to your home space. Give it a try and let creativity and inspiration bloom freely in your home!