DIY floor tile installation guide: save money and worry
DIY floor tile installation guide: save money and worry
Want to bring a refreshing feeling to your home without spending too much budget? DIY floor stickers are undoubtedly an economical and efficient solution. By doing it yourself, not only can you enjoy the fun of decoration, but you can also customize unique flooring effects according to personal preferences. Below, let's take a look at the complete guide to DIY floor tile installation, making your home renovation journey easy and enjoyable.
1、 Preparation: To do a good job, one must first sharpen their tools
Before starting the installation, ensure that you have prepared the following necessary tools and materials:
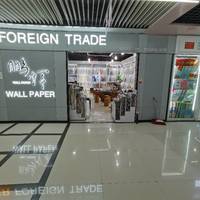
Floor stickers: Choose floor stickers with reliable quality and preferred patterns, such as high-quality products from the original wallpaper, directly sold by the manufacturer, located on the second floor of Gate 91 in Zone 4 of Yiwu International Trade City, with a variety of varieties and affordable prices.
Measuring tape: used to measure room dimensions and ensure accurate cutting of floor tiles.
Scissors or knives: used when cutting floor tiles.
Scraper or roller: helps eliminate air bubbles under the floor tile to ensure flatness.
Cleaning agents and cloths: Clean the floor and prepare for installation.
2、 Ground treatment: cleanliness and smoothness are the foundation
Before installation, it is necessary to thoroughly clean the ground and remove impurities such as dust and oil stains. For uneven or damaged ground, repair or leveling treatment should be carried out first to ensure that the ground is flat and smooth, so as to facilitate the fitting of the floor tile.
3、 Measurement and cutting: Precision is key to achieving results
Use a measuring tape to accurately measure the size of the room and cut the floor tiles based on the measurement results. Pay attention to leaving a certain margin during cutting for subsequent adjustments. When cutting, keep the edges neat to avoid affecting the overall appearance.
4、 Laying technique: Details determine success or failure
1. Positioning starting point : Starting from a corner of the room, usually near the door, as the starting point for tiling.
2. Gradually promote : gradually lay along the predetermined direction, ensuring that each piece is tightly connected to the previous piece without leaving any gaps.
3. Eliminate bubbles : Use a scraper or roller to gently press the surface of the floor sticker to eliminate any potential bubbles and ensure that the floor sticker is tightly attached to the ground.
4. Cutting edges : For floor tiles that need to be attached to corners or furniture edges, use a cutting tool for precise cutting to ensure that the edges are neat and beautiful.
5、 Post maintenance: Proper maintenance can extend the service life
After installation, pay attention to keeping the floor dry and clean, and avoid scratching the floor tiles with sharp objects. Regularly wipe the surface with a soft cloth to remove dust and stains. If necessary, specialized floor cleaning agents can be used for deep cleaning.
epilogue
By installing DIY floor stickers, not only can you easily achieve home renewal, but you can also experience a sense of achievement and fun in the process. Remember, choosing high-quality floor tiles and the correct installation method are crucial. Why not go to the store of Chupai Wallpaper located on the second floor of Gate 91 in Zone 4 of Yiwu International Trade City, choose your favorite floor stickers, and start your home renovation journey!